Add or Edit Images
In this article we will walk you through adding and updating images through Topics using the text editor (Radeditor) in admin console.
Adding a Image
In this example, we will show you how to add an image at the bottom of the existing About Us Topic page.
- In your admin console, go to Content > Manage Topics and in the filters field, search for the topic name “about” then, click on the Topic title to edit the Topic.
- Scroll to the bottom of the topic page and click into the text editor where the image needs to be placed. Then, select the Image Manager icon.
- After the Image Manager window opens, select the Upload button to add the image to your website.

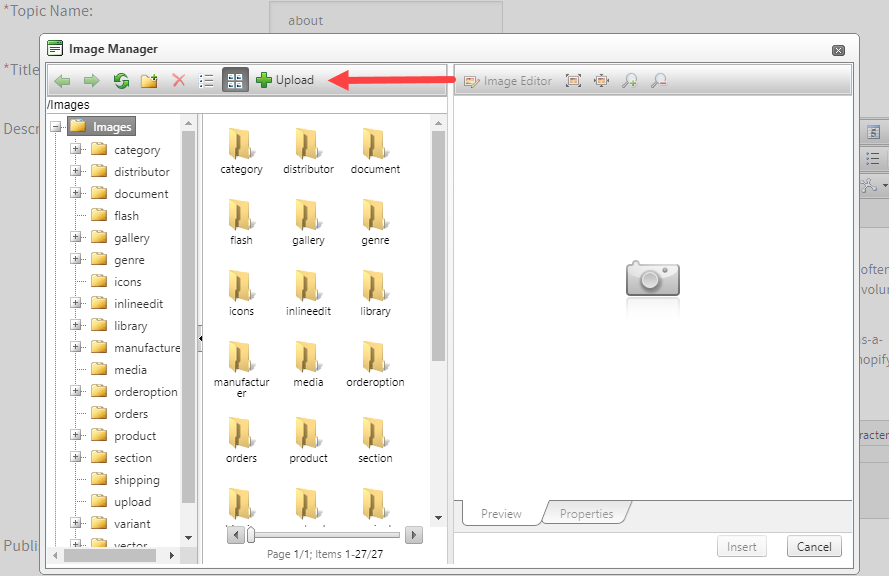
Follow the prompts to upload your image – see screenshots below. Please note the max file size file extensions allowed.
Choose the Select Button:

Locate the image on your PC, select the image and then choose Open:

You will now see the image in the Upload screen. Select the Upload button at the bottom of this window:

The image will be auto selected in the Image Manager screen. If the image is not auto selected, locate it within the images folder and selected it. Then hit the Insert button:
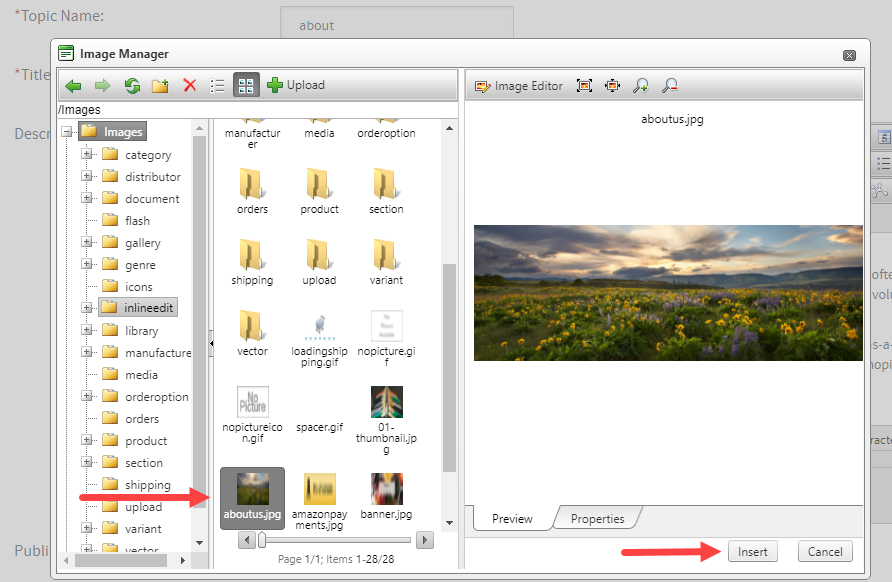
Save your changes.
You will now see that the image is selected and has been added at the bottom of the topic:
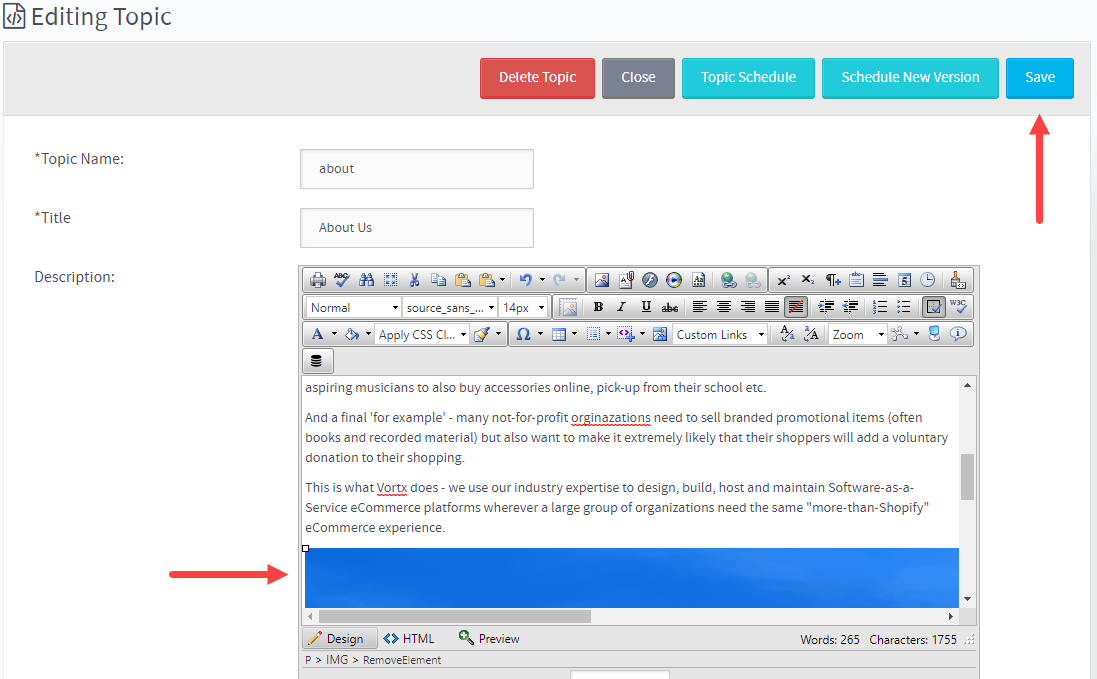
Now that we have the image in place, we will want to ensure the image ‘flexes’ for each viewport (Desktop, Tablet & Mobile). This will require that we switch from design mode to HTML mode in the topic text editor.
4. Select the HTML button at the bottom of the text editor and then scroll to the bottom of the topic. You will see an image tag that looks similar to this:
<img alt="" src="/Images/aboutus.jpg" />
And here it is within the topic:

5. You will need to add a Css class to the image tag - below is the code that will need to be pasted into the image tag:
class=”img-responsive”
and here is how the code looks within the image tag:

6. Save your changes and the hit the Refresh Store button. You can see the image is now displaying on the About Us page:
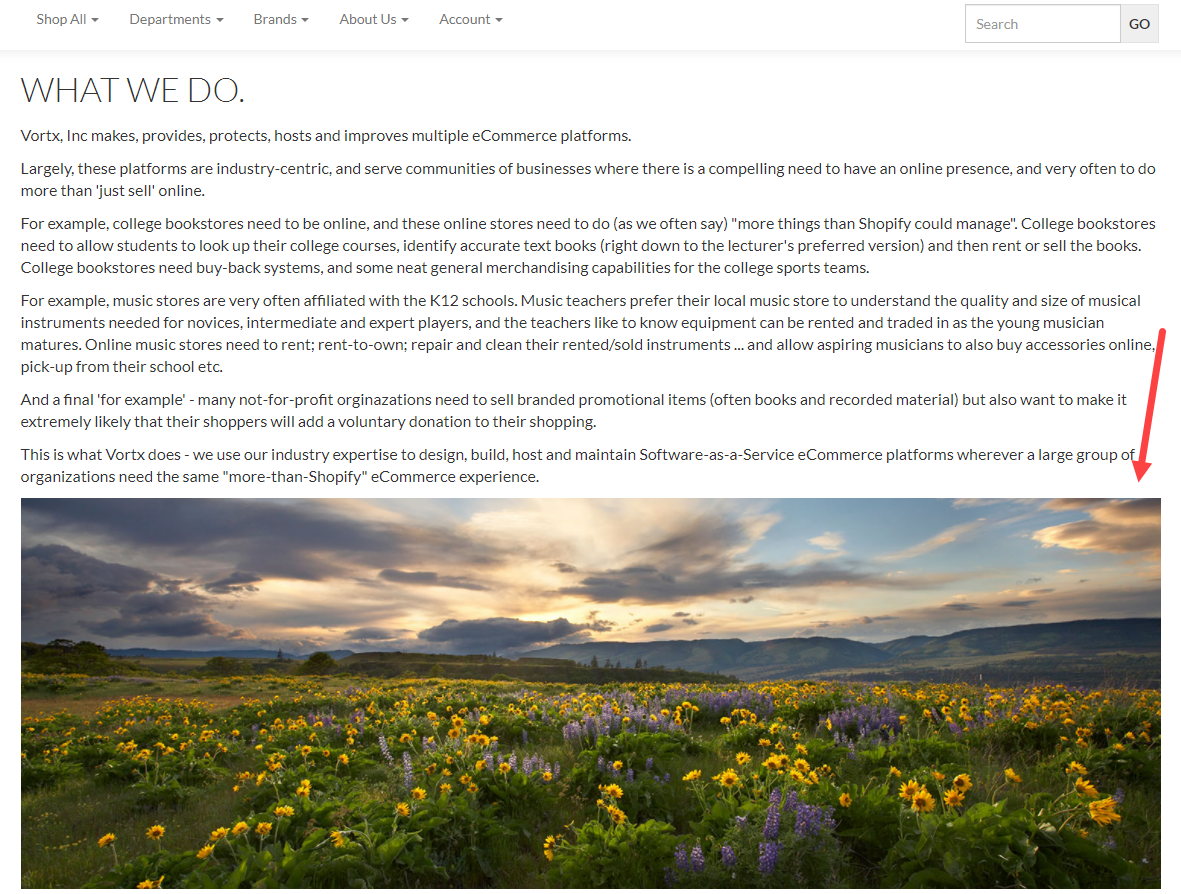
Editing an existing Image
We will use the About us topic to change the image we just uploaded above.
- In the admin console, go to Content > Manage Topics and in the filters field, search for the topic name “about” then, click on the title to edit the topic.
- Locate the image in the topic and click on it to highlight it. Then select the Image Manager.
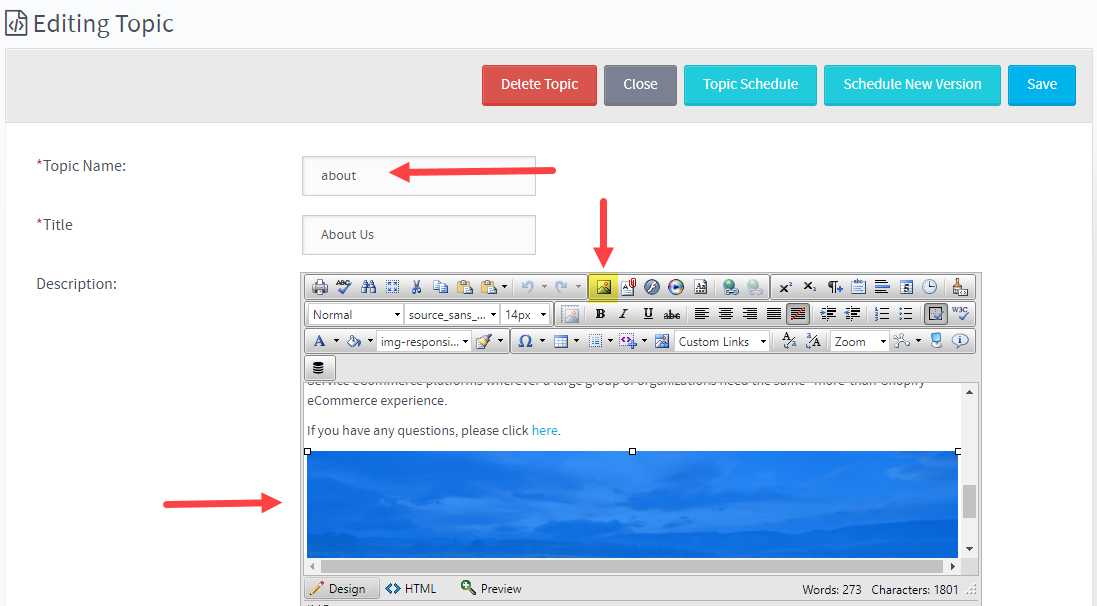
Follow steps 3 through 6 above. If you have done everything correctly, the new image uploaded should have replaced the existing image on this page.
Adding or Editing a Link
In this example, we will show you how to add a link at the bottom of the existing About Us Topic page.
- In the admin console, go to Content > Manage Topics and in the filters field, search for the topic name “about” then, click on the Topic title to edit the topic.
- Click into the text editor and highlight the section of text that needs to be a link. Then, select the Hyperlink Manager icon. If you are updating an existing link, highlight the text where the link already exists and then choose the Hyperlink Manager.

- In the Hyperlink Manager window, input the link in the URL. If a link already exists, just update the URL to point to the new link. If you would like for this link to open in a new browser window when clicked, changed the Target to New Window. Click OK.

- You will see that the text color where we applied the link now differs from the text color for the rest of the paragraph. Save your changes and then refresh the website. The word “Vortx” is now an active link on the About Us page and when clicked, it will open in a new browser tab. Make sure to test the link to ensure it goes to the correct destination.

Adding or Editing a PDF
In this example, we will show you how to add a PDF document and link it to a word within a topic. We will also be using the “about” topic as an example.
- In the admin console, go to Content > Manage Topics and in the filters field, search for the topic name “about” then, click on the title to edit the topic.
- Locate and highlight the text that you would like to link to your PDF. Then, select the Document Manager icon. If you are updating an existing PDF, highlight the text where the link to the PDF already exists.

- After the Document Manager window opens, select the Upload button to add the PDF to your website.

Follow the prompts to upload your PDF – see screenshots below. Please note the max file size file extensions allowed.
Choose the Select Button:

Locate the PDF on your PC, select the PDF and then choose Open:
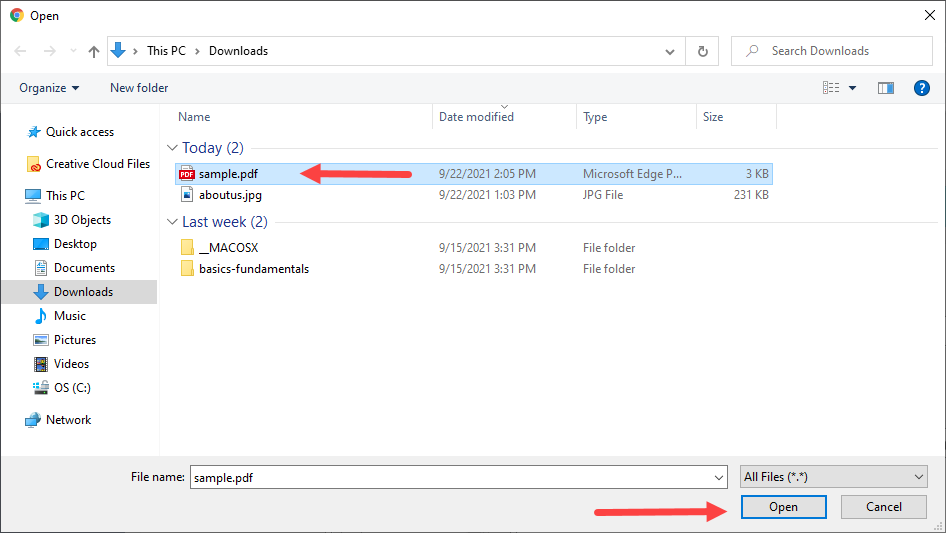
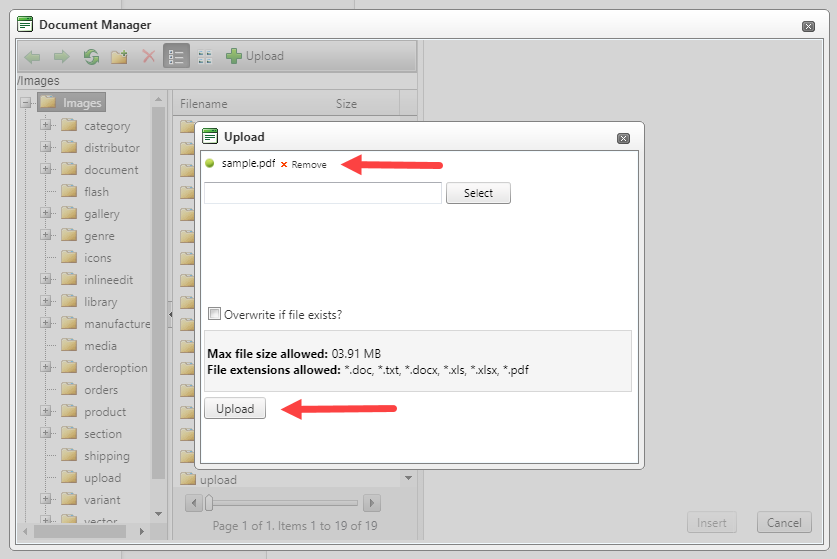
You will now see the PDF in the Upload screen. Select the Upload button at the bottom of this window:
The PDF will be auto selected in the Document Manager screen. If the PDF is not auto selected, locate it within the images folder and selected it. Then hit the Insert button:
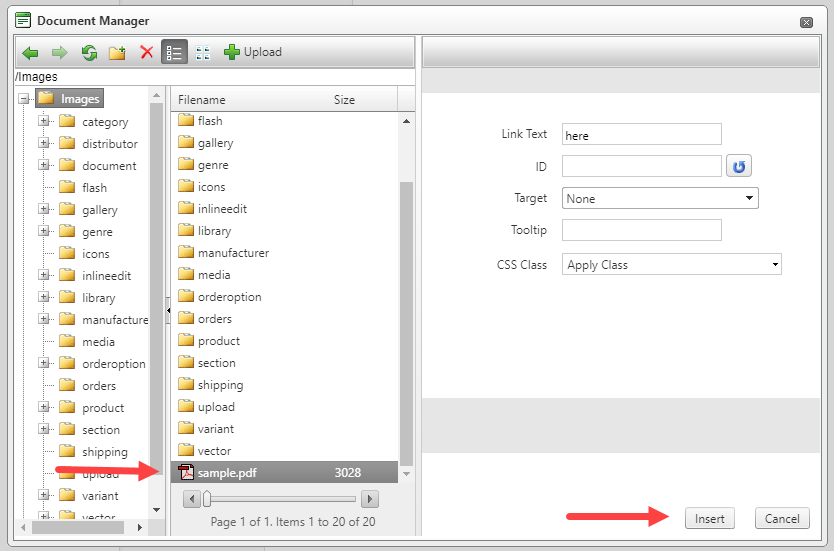
Save your changes. You will now see that the word “here” is a different color then the other text because it is now hyperlinked to the PDF we have just added.
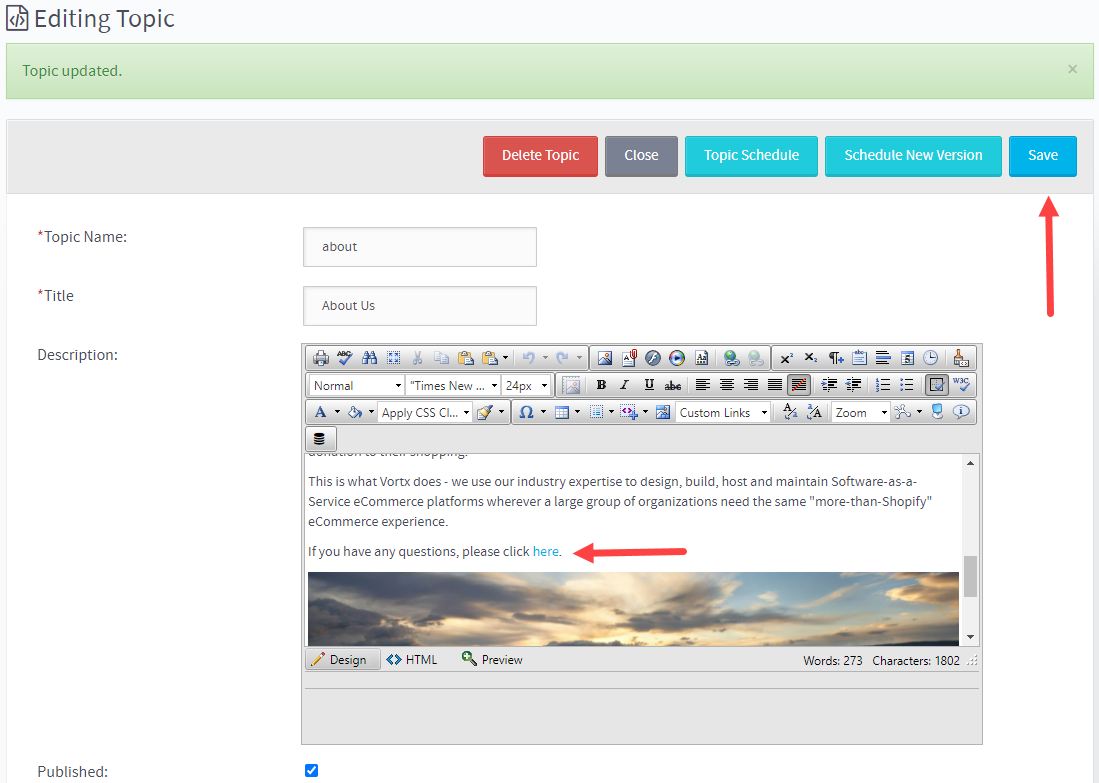
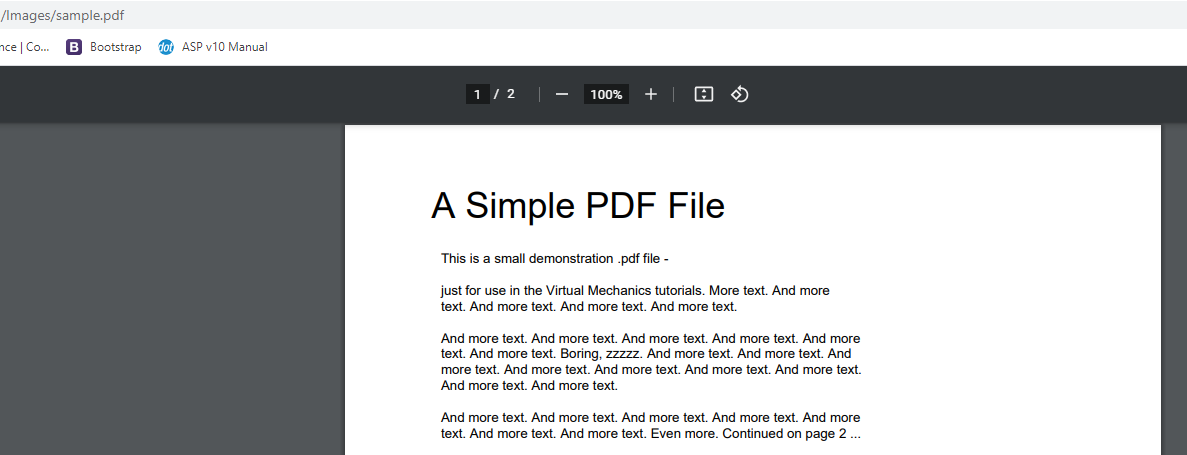
4. Refresh your website and click on the word “here”. It should now open the PDF we just uploaded:

TIP: If you would prefer to have your PDF open in a new browser tab rather then in an existing window then you will need to set the Target within the text editor. Just highlight the word “here” and then select New Window from the Target dropdown menu. Save your changes.

Was this article helpful?
That’s Great!
Thank you for your feedback
Sorry! We couldn't be helpful
Thank you for your feedback
Feedback sent
We appreciate your effort and will try to fix the article